
How 'Code Generator' Works?
‘Code Generator’ is a tool used to generate source code in real time for various computer programming languages. Currently, it supports language Java and Kotlin. It uses software data-structure as a medium or input to generate source code.
You can use this information to generate the source code and also, to integrate it into your live project for the following different libraries :
– Android Room Library using Java.
– Android Room Library using Kotlin.
– Android SQLiteOpenHelper using Java.
This guide will help you understand the working of ‘Code Generator’ in three easy steps as follows :
Step 1 : Create your Data Structure
Step 2 : Generate Source Code
Step 3 : Copy Generated Files into Workspace
Lets Begin!
STEP 1 : CREATE YOUR DATA-STRUCTURE USING 'CODE GENERATOR'

I will be using sample data structure to explain the working principle of ‘Code Generator’.
If you have already created data structure for your application, I would suggest you to make use of that while going through this tutorial.
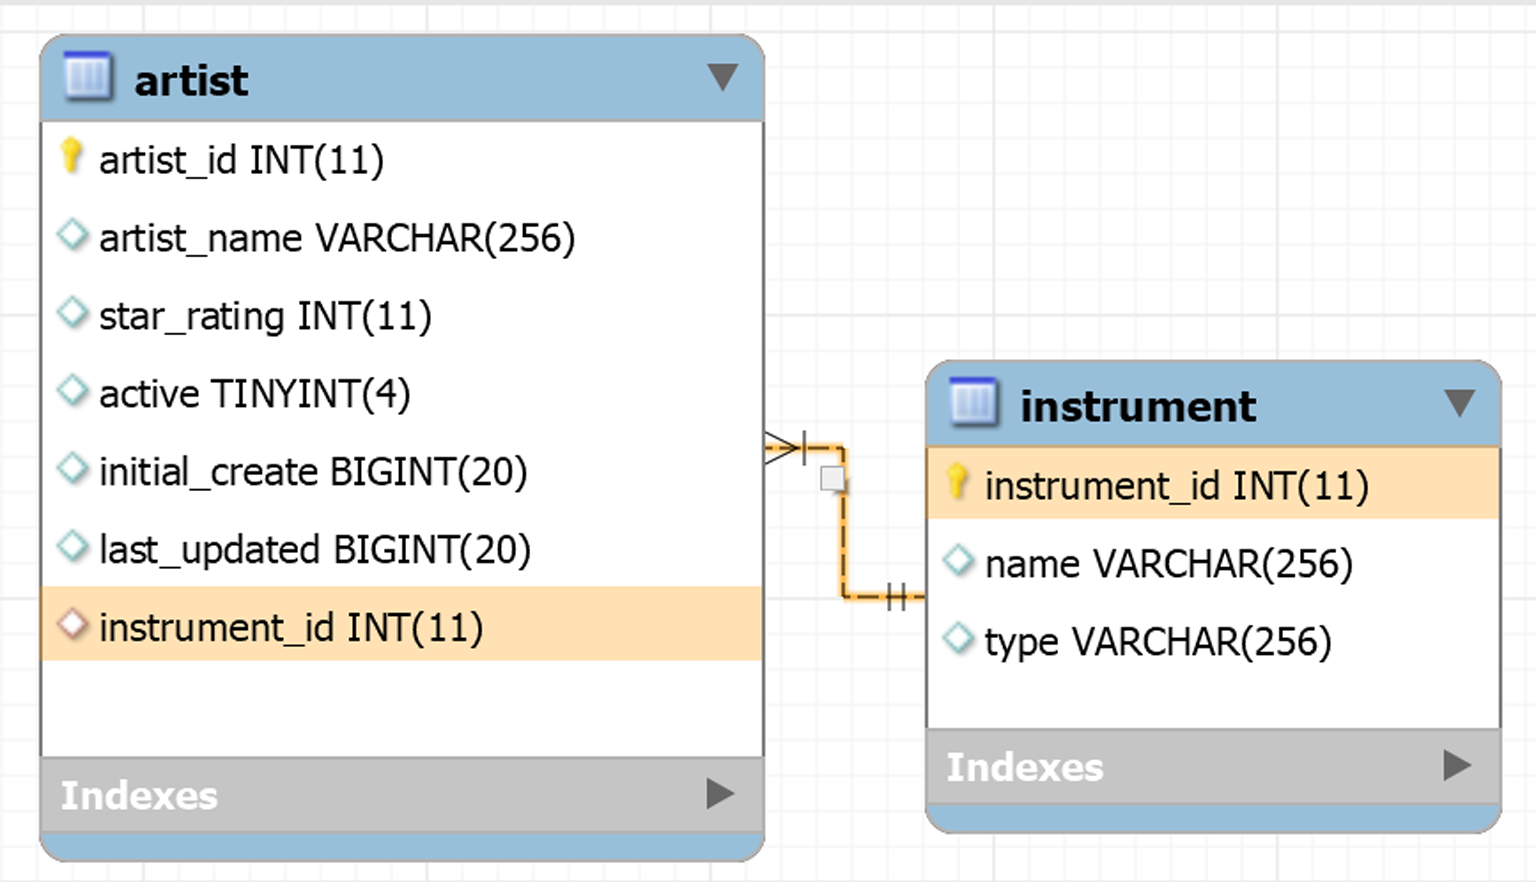
My Sample Data Model
Database Name : music_academy
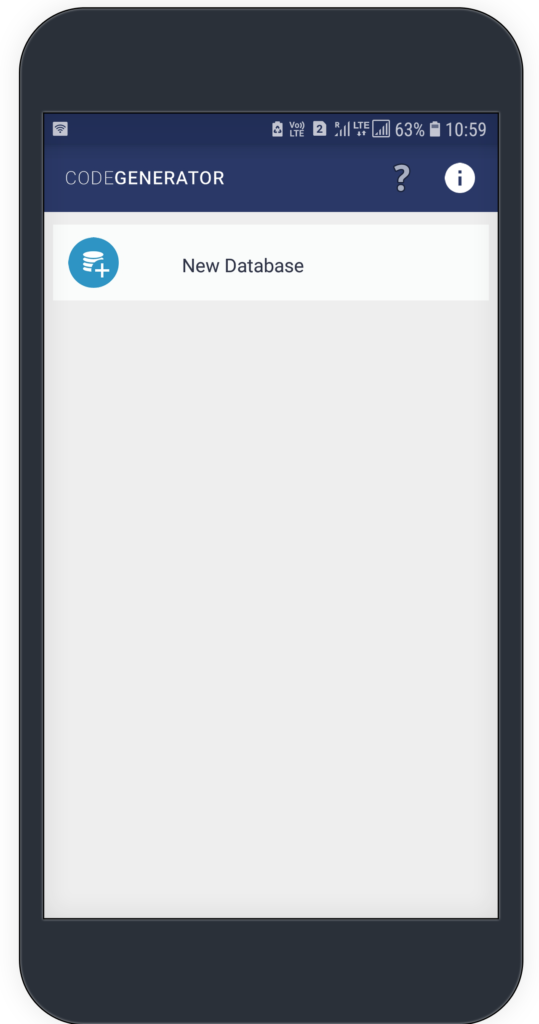
Launch ‘Code Generator’ Android application.
If you haven’t installed the application as yet, please refer to the link here.
– Tap on ‘New Database’ and enter your Sqlite database name.

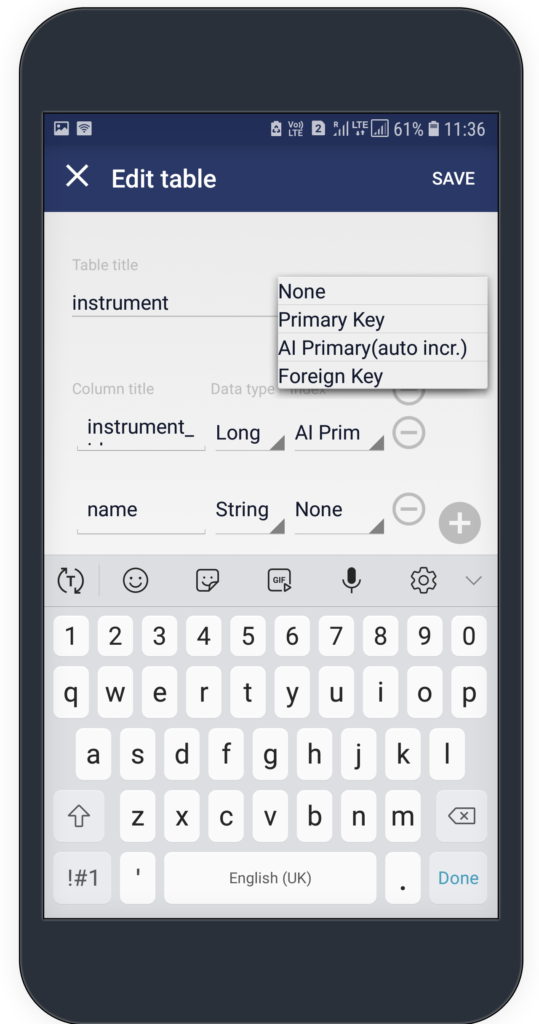
– Tap on ‘New Table’ and create your table structure within the app.
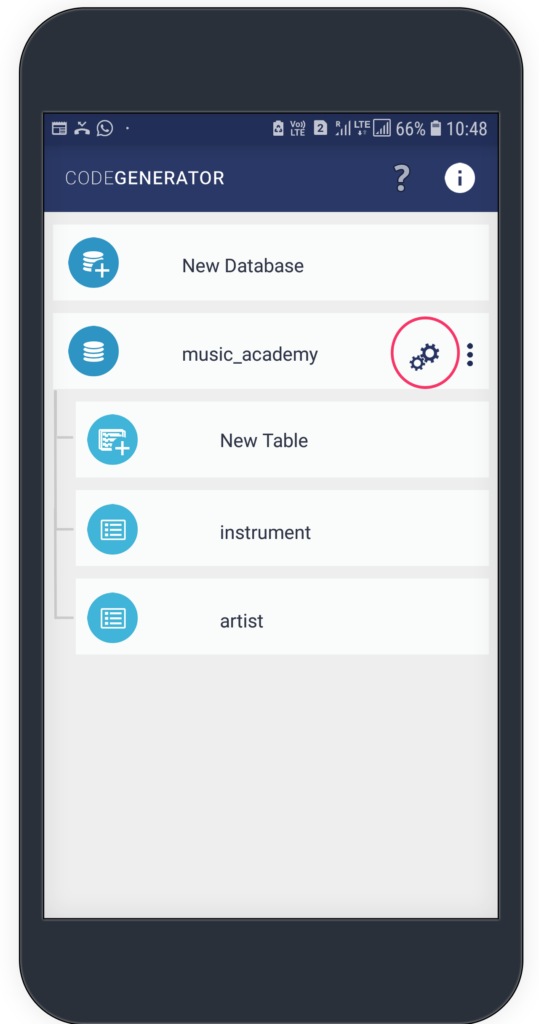
– Tap on your database name, in my case its “music_academy”.
As soon as you tap on your database name, generate icon should appear as it is marked in the red circle in the given image.
Tap on this ‘Generate’ icon.

STEP 2 : Generate Source Code

By this time, you might have already done creating your data structure within the ‘Code Generator’ application.
Now, we will look how this application can generate the source code with one click.
– Tap on your database name, in my case its “music_academy”.
As soon as you tap on your database name, generate icon should appear as it is marked in the red circle in the given image.
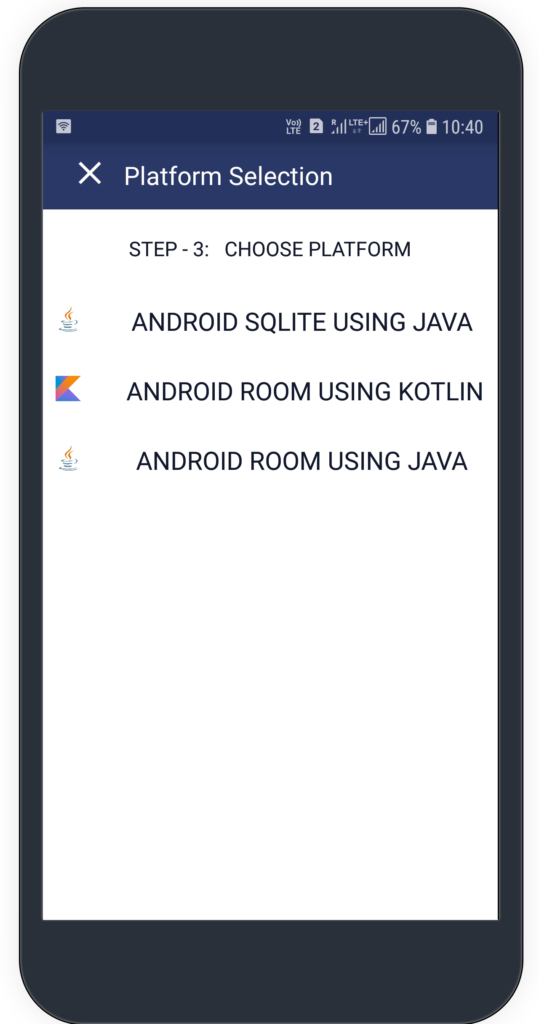
Tap on this ‘Generate’ icon then select platform you are targeting.
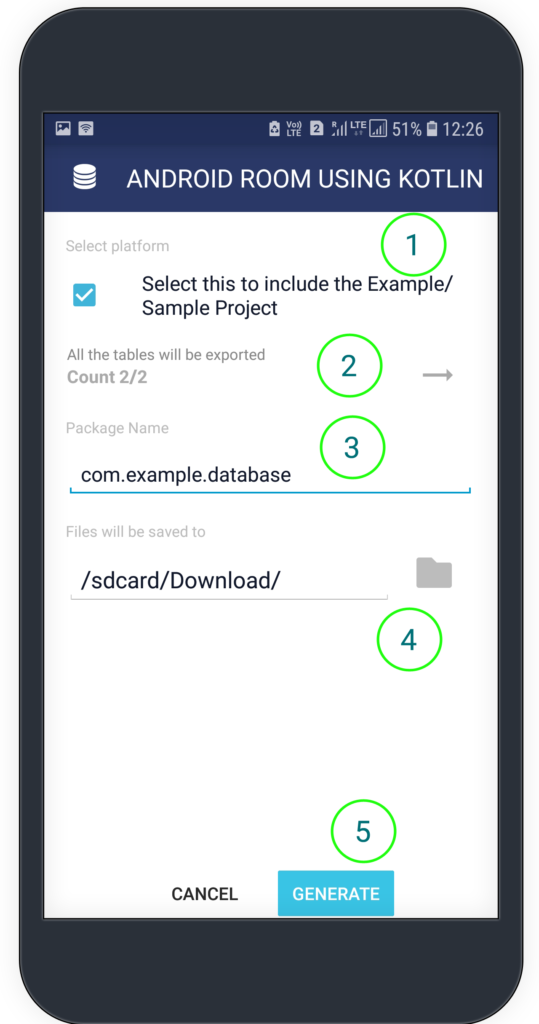
Please refer to the circles marked in green:
#1 – On top of the screen, enabling check box would also include the example project for Android Room using Kotlin in Android Studio.
#2 – You can select the number of tables for which you need the source code to be generated.
#3 – You can edit the package name as per your project structure using this option.
#4 – This is the place where all the generated source code shall be stored. You can update this location if you want.
#5 – Finally, tap on ‘Generate’ to
generate Kotlin source code
STEP 3 : Copy the Generated Source Code Files into your Android Studio Workspace

This is the final step of copying the generated kotlin source code files into your android studio workspace.
Now, we will navigate to the source directory and copy the files.
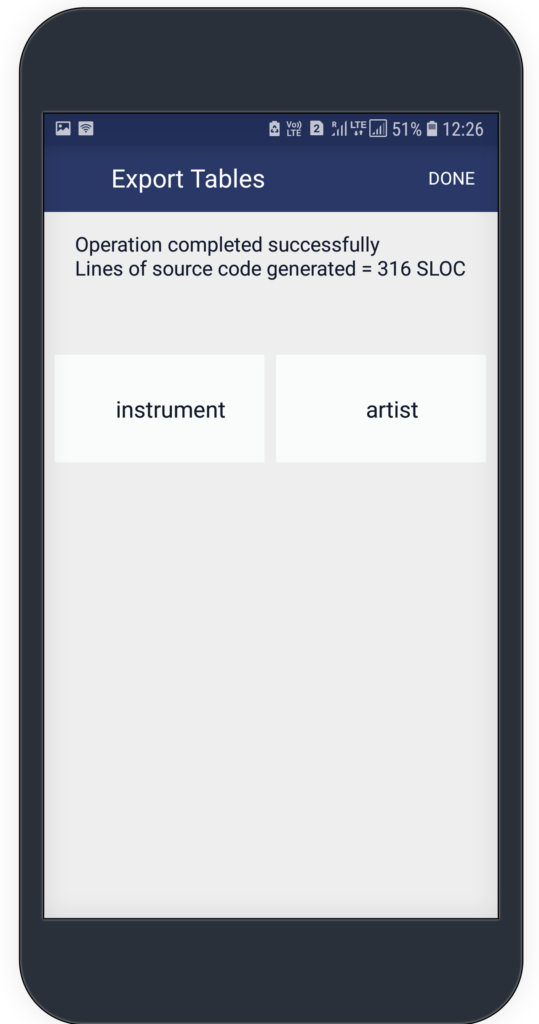
#4 – Look at the green circle in the screenshot attached. This is the place where all the generated source code files shall be stored. Let’s check these files at this location.
We are going to transfer all these files to computer system where your Android Studio is running.
If you are not sure, how to transfer files from your device to your computer, please refer to this link here.

Now comes the Computer Screen.
If you look at the file path, this is what we have chosen during source code generation through ‘Code Generator’.
It also contains additional folder named as “2020_06_09__12_25_47” which comes with current date and time.
This is added to keep records of all the generated source code files for Android Room using Kotlin.

Let’s explore further by digging into the given directories. Two folders shall be created.
1. Java Directory
2. SampleCode Directory
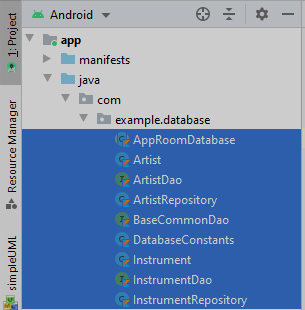
Java Directory

Copy Kotlin extended files into android studio project. Same steps you need to follow even if you are targeting for any other platform (e.g SQLiteOpenHelper or Room Library using Java). Make sure you copy these files under the same package name you have added in the ‘Code Generator’.
If you haven’t created the package as yet, add the package. In my case it is “com.example.database” I have added this into my project hierarchy.


SampleCode Directory
It contains source code zip file which can be directly imported into Android Studio. If you are not familiar of importing existing Android studio project into workbench, you can refer to the link here.
Conclusion
I have tried to keep this tutorial simple without giving a deep dive.
For further reading on, how to call the generated APIs. I would suggest you to please look at the generated ‘SampleCode’ where you can find examples to perform operations such as : ADD, MODIFY, GET or DELETION.
If you find anything missing or obvious which should be part of this tutorial, feel free to reach us here.
Don’t miss to subscribe, I will be sharing more contents on software programming practices.
For further reading, you can check these blog posts here.